























For students and office-goers alike, a lunch bag is an essential daily companion. It diligently carries our tiffins, fresh fruits, water bottles, and assorted snacks day in and day out. However, while we often make sure the outside of the bag looks presentable, the interior is frequently neglected. Over time, unseen spills, lingering food stains, oily residues, and trapped moisture build up inside the dark confines of the bag. This hidden grime eventually transforms into stubborn odors and creates a breeding ground for harmful bacteria. Sometimes, just a few drops of spilled dal or vegetable curry can dry up and become invisible, yet they leave behind a persistent, unpleasant smell that ruins your appetite.
The Importance of Regular Cleaning
Maintaining the hygiene of your lunch bag is not just about aesthetics; it is crucial for food safety. A thorough and regular cleaning routine can significantly extend the lifespan of your bag, keeping it looking brand new for years. More importantly, a sanitized environment ensures that the food you carry remains safe to consume. The good news is that achieving a fresh, germ-free lunch bag does not require expensive, specialized cleaning products. With the right techniques and a few common household items, you can easily restore your bag to its original freshness.
Step One: Completely Empty the Bag
The very first step in the cleaning process is to ensure the bag is entirely empty. Remove all containers, bottles, and loose items. It is essential to carefully inspect the smaller compartments, side pockets, and the areas around the zippers. Often, small leftover items like used tissues, misplaced spoons, forgotten salt sachets, or sticky sauce packets remain hidden in these crevices. Once you are certain every pocket is empty, take the bag and turn it upside down. Give it a gentle but firm shake to dislodge and remove any loose dust, dried food crumbs, or debris that might be resting at the bottom.
Wiping the Interior and Exterior
Once the loose debris is gone, it is time to tackle the surfaces. Prepare a gentle cleaning solution by mixing a mild soap in lukewarm water. Dip a soft cloth into this solution, wring out the excess liquid, and use it to thoroughly wipe down both the interior lining and the exterior fabric of the bag. If you encounter stubborn oil marks or dried vegetable stains, spend a little extra time gently scrubbing those specific areas. It is critical to avoid using harsh chemical cleaners or strong detergents, as these abrasive substances can permanently damage the bag's protective inner lining and compromise its insulation.
Tackling Corners and Zippers
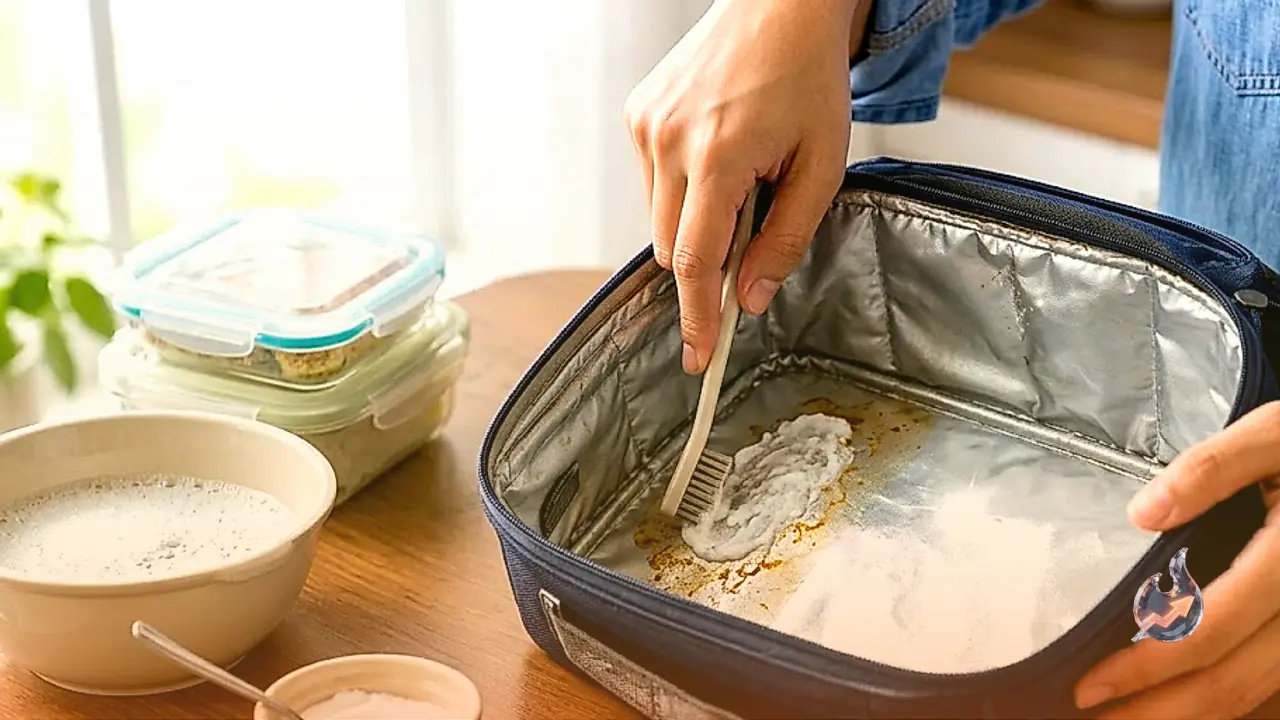
The most challenging parts of any lunch bag to clean are the deep corners, the stitched seams, and the tracks of the zippers. These specific areas are notorious for trapping the highest amount of food particles and dirt. To effectively clean these hard-to-reach spots, repurpose an old, clean toothbrush. Dip the toothbrush into your soapy water and gently scrub the seams and zipper lines. By using a light hand and short brushing motions, you can easily dislodge the deeply embedded grime without fraying the fabric or breaking the zipper teeth.
Banishing Stubborn Odors
Sometimes, even after a thorough washing, a lingering food smell remains trapped in the material. If your bag still smells after cleaning, you can utilize the natural deodorizing power of baking soda. Simply fill a small bowl with baking soda and leave it inside the closed lunch bag overnight. Alternatively, a small pouch of activated charcoal works wonders. Both of these household items are excellent at absorbing and neutralizing foul odors rather than just masking them. The next morning, remove the bowl or pouch and leave the bag open in fresh air for a while to complete the deodorization process.
The Crucial Drying Phase
After cleaning, never use the bag immediately or zip it shut while it is still damp. It is imperative to leave the bag completely open and allow it to air dry thoroughly. If even a small amount of moisture remains trapped inside the lining, it significantly increases the chances of foul odors returning and creates a perfect environment for mold to grow. Always try to place the freshly cleaned bag in a well-ventilated area where air can circulate freely inside the compartments.
Utilizing Sunlight for Freshness
Occasionally placing your lunch bag out in the sun can also help maintain its freshness. A brief period of exposure to mild sunlight can help eliminate lingering odors and dry out any hidden dampness. However, you must exercise caution. Leaving the bag in intense, direct sunlight for extended periods can cause the fabric's color to fade and may degrade the insulating materials. Therefore, placing it in mild morning sunlight or a breezy, shaded area outdoors is always the better and safer choice.
Daily Maintenance and Prevention
The best way to keep your lunch bag clean is to prevent messes before they happen. Always ensure that the lids of your tiffin boxes and containers are tightly sealed to prevent accidental leaks. If a spill does occur, make it a habit to wipe it up immediately on the same day, before it has a chance to dry and set into the fabric. Additionally, make it a routine to quickly wipe the interior with a damp cloth at least once a week. This simple habit prevents the gradual buildup of grime and keeps the bag hygienic.
Checking Labels and Proper Storage
Before attempting any deep cleaning, always read the manufacturer's care label attached to the bag. While some durable lunch bags are completely safe to wash in a washing machine, many others are specifically designed for hand-washing only to protect their shape and insulation. Following these instructions ensures you do not accidentally ruin the bag. Finally, when the lunch bag is not going to be used for a few days, ensure it is absolutely bone-dry before storing it away. If you zip up and store a bag that retains any moisture, you will likely find it covered in mold and smelling terrible the next time you open it.