























The monsoon season is widely considered the ideal time to cultivate vibrant green vegetables on home balconies and terraces. High atmospheric moisture during these months eliminates the need for exhaustive gardening effort, allowing plants to establish roots smoothly. Much like bottle gourds and pumpkins, tomato plants thrive effortlessly in container environments. However, in today's fast-paced routines, finding time to visit commercial nurseries or agricultural shops to buy seed packets can be challenging. Fortunately, growing fresh and juicy organic tomatoes at home does not require commercially packaged seeds at all. You can easily propagate healthy tomato plants using fresh store-bought kitchen tomatoes or stem cuttings taken from existing plants. Even discarded plastic bottles and basic household containers can yield a bountiful harvest. All it takes is selecting the right container depth, blending a nutrient-rich soil mix, and applying organic fertilizers at appropriate intervals.
Selecting the Right Pot and Understanding Seasonal Cycles
Tomatoes are versatile crops that can be cultivated across three distinct seasonal cycles throughout the year. Planting can take place during the monsoon rains, at the onset of winter, and during early summer. Different specialized varieties are sown according to each specific season. If you lack the time to purchase commercial seeds or do not have an agricultural supplier nearby, seedless propagation techniques offer a seamless alternative. Tomato stems possess remarkable regenerative capabilities, allowing cuttings to develop healthy root systems rapidly. When selecting containers for home gardening, ensure that the pot depth measures at least 12 to 14 inches. Tomato roots require sufficient depth to expand; shallow pots restrict root development and stunt overall plant growth. Two primary seedless propagation methods exist for home gardeners, both delivering reliable yields when executed correctly.
Method One: Propagating Tomatoes via Stem Cuttings
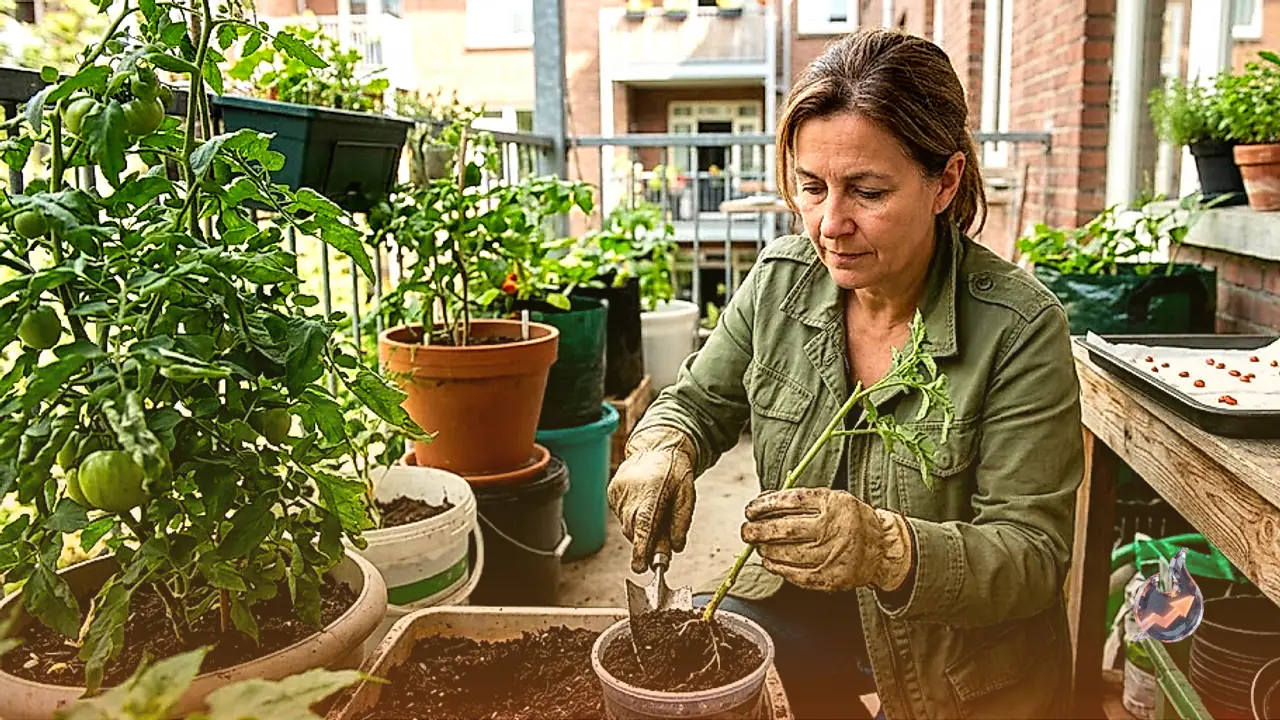
Propagating tomato plants from stem cuttings is one of the fastest and most efficient methods available. Begin by selecting a healthy, mature branch from an existing tomato plant. Always make the stem cut at a precise 45-degree angle to maximize the surface area for root development. Retain only one or two top leaves on the cutting while carefully stripping away all lower foliage. If the cutting has any open flower buds, remove them immediately so that the plant directs all its stored energy toward generating new roots. Next, fill an 8 to 10 inch starter pot with prepared soil and insert the cutting. Alternatively, you can submerge the base of the cutting in a glass of water for 5 to 7 days. Within a week, fine white root strands will emerge from the submerged stem, signaling that the cutting is ready for transplanting into a larger pot.
Direct soil insertion is another widely practiced technique for stem cuttings. Once the 45-degree cut is made, immediately plant the stem into a prepared container to prevent the cutting from drying out and to minimize transplant shock. Plant the stem at least 3 inches deep into the moist soil mixture. After planting, thoroughly water the container and place it in a shaded area away from direct sunlight for at least 10 days. The key advantage of propagating via stem cuttings is that the resulting plant skips the lengthy germination phase, leading to significantly faster flowering and earlier fruit production.
Preparing the Nutrient-Rich Soil Mix
The quality of the potting medium plays a vital role in determining the health and productivity of potted tomato plants. To create an optimal nutrient balance, combine 50 percent regular garden soil with 30 percent well-rotted cow dung manure or vermicompost. Allocate the remaining 20 percent of the mixture to cocopeat or clean river sand to ensure proper aeration and prevent soil compaction. Thoroughly blend these components together. To safeguard the root zone against soil-borne pathogens while supplying slow-release nutrients, add a small quantity of mustard cake powder and neem cake powder to the mix. Ensure that the selected container features functional drainage holes at the base so excess water drains freely, preventing root rot.
To further enrich the potting medium, mix in a small amount of agricultural lime or calcium powder. Calcium is essential for building sturdy cell walls in tomato stems and preventing blossom end rot in developing fruits. Fill the container with this custom soil mix, pressing it down gently. This balanced soil structure provides all the necessary macronutrients and trace minerals required from the initial growth phase through final harvest.
Method Two: Extracting Seeds from Fresh Kitchen Tomatoes
If stem cuttings are not available, you can raise healthy seedlings using fresh tomatoes purchased for daily cooking. This approach is arguably the simplest method for urban home gardeners. Select the largest, firmest, and fully ripened tomato from your kitchen inventory, as larger fruits contain well-developed, viable seeds. Slice the tomato open and extract the seeds into a clean bowl. Gently rub and mash the seed pulp between your fingers to separate the seeds from the surrounding gel.
Scatter the extracted seeds evenly across the surface of the prepared soil mix in your container. Cover the seeds with a very thin layer of fine soil to shield them from exposure, and water lightly using a spray bottle. Water the pot only when the top layer of soil feels dry to the touch, as overwatering can cause delicate seeds to rot. Under proper moisture conditions, germination will occur within 10 to 15 days, revealing small green seedlings. Once these saplings grow and develop 4 to 5 true leaves, carefully separate them and transplant individual plants into dedicated 12 to 14 inch pots.
A streamlined variation of this method involves placing fresh tomato seeds directly onto loose, crumbly topsoil and covering them lightly with dirt before watering. Sprouts will typically emerge within 10 days under this method. Once transplanted into individual containers, feed the young plants every 10 days with well-decomposed cow dung manure or rich vermicompost. Because young tomato stems are naturally flexible and delicate, stake the plants with sturdy wooden sticks after 20 to 25 days of growth or right before the first flowers appear to provide structural support as they grow taller.
Pruning, Root Filling, and Pest Control Techniques
Approximately one month after planting, the tomato plant will begin producing bright yellow blossoms. To maximize fruit yield from a single plant, it is necessary to encourage bushy, lateral growth. Accomplish this by pruning away small, non-productive sucker branches that sprout along the lower portion of the main stem. Removing lower foliage improves air circulation, directs nutrients toward fruiting branches, and strengthens the main stem. Following pruning, perform a specialized soil nourishment routine known as root filling.
Root filling involves carefully excavating a thin layer of topsoil around the base of the plant to expose the upper root area. Dust a small amount of calcium powder directly over the root zone and apply a fresh layer of vermicompost. Withhold watering immediately after root filling for a few hours to allow the roots to absorb the nutrients. To sustain heavy fruiting, feed the plant with an organic solution of mustard cake and neem cake every 20 to 25 days. Furthermore, apply a light spray of diluted neem oil at regular intervals to protect foliage against fungal infections and common garden pests.
Moisture Management and the 90-100 Day Harvest Timeline
Consistent irrigation management is critical throughout the flowering and fruiting stages. Maintain uniform moisture levels in the soil when yellow blossoms appear. If the plant experiences drought stress or if the soil dries out completely during bloom, the flowers will drop off prematurely without setting fruit. The transition from flower pollination to small green fruit formation takes roughly one month.
Once green tomatoes appear, they require an additional 10 to 15 days to expand in size and ripen into deep red fruits. In total, the complete growth cycle from sowing seeds or setting stem cuttings to picking fully ripened organic tomatoes spans 90 to 100 days. With basic attention to soil preparation, proper staking, regular pruning, and balanced watering, any gardener can enjoy a continuous supply of homegrown, chemical-free tomatoes right from their balcony.