





















Wardrobes in almost every home gather a collection of garments that are no longer worn but feel too precious or sentimental to simply discard or relegate to cleaning rags. Old t-shirts are particularly prone to sitting unused in closet corners. Transforming these forgotten pieces of clothing into everyday grocery bags offers an eco-friendly and practical alternative to generating household waste. Without needing any needle, thread, or sewing machine, an ordinary pair of scissors is all that is required to craft a functional, reusable tote in less than 10 minutes. The entire technique relies strictly on cutting in the right positions and tying secure knots.
Selecting the Right Fabric and Initial Setup
The first critical decision involves choosing a t-shirt suited for your intended everyday use. The durability of the finished tote depends directly on the density of the jersey cotton. For holding heavy groceries like potatoes, onions, or dairy items, selecting a thick, heavyweight cotton shirt ensures the bottom will not sag excessively or rip under load. Conversely, softer, thinner, and heavily worn t-shirts remain perfectly adequate for picking up lightweight essentials, toiletries, or casual dry items.
Before taking scissors to the fabric, ensure the garment is freshly washed and completely dry. Washing forces the fibers to preshrink naturally, preventing unwanted warping or distortion after the cuts are made. Once fully dried, lay the t-shirt completely flat and inside-out on a smooth table or clean floor, smoothing out every crease and fold. You will need a pair of sharp fabric scissors. To guarantee clean lines, keep a standard measuring ruler and a washable fabric marker nearby to map out your cutting paths beforehand.
Shaping the Handles and Neckline
The upper section of the shirt forms the functional carrying handles of the tote. Begin by cutting away both sleeves along the inner seam line. Take deliberate care not to cut into the shoulder seams, as these reinforced shoulder sections must remain intact to bear the full weight of the packed bag. Next, trim off the ribbed collar along the neckline. You can widen or deepen the curve depending on personal preference and how wide an opening you require.
To ensure perfect symmetry across both sides, fold the t-shirt cleanly in half lengthwise before slicing the fabric. Cutting through both folded halves simultaneously guarantees that the armhole cutouts match exactly in size and curvature, leaving the straps and central neck opening balanced, even, and neat.
Cutting the Bottom Fringe to Form the Base
Once the upper straps are shaped, shift your attention to constructing a sealed base at the bottom hem. With the shirt lying flat and turned inside-out, slice off the stitched bottom hem entirely. Next, decide how deep the main storage compartment should be and draw a horizontal reference line across the lower body of the shirt. Keep in mind that longer fringe strips yield a shallower interior cavity, and cotton fabric naturally stretches downwards once loaded with items.
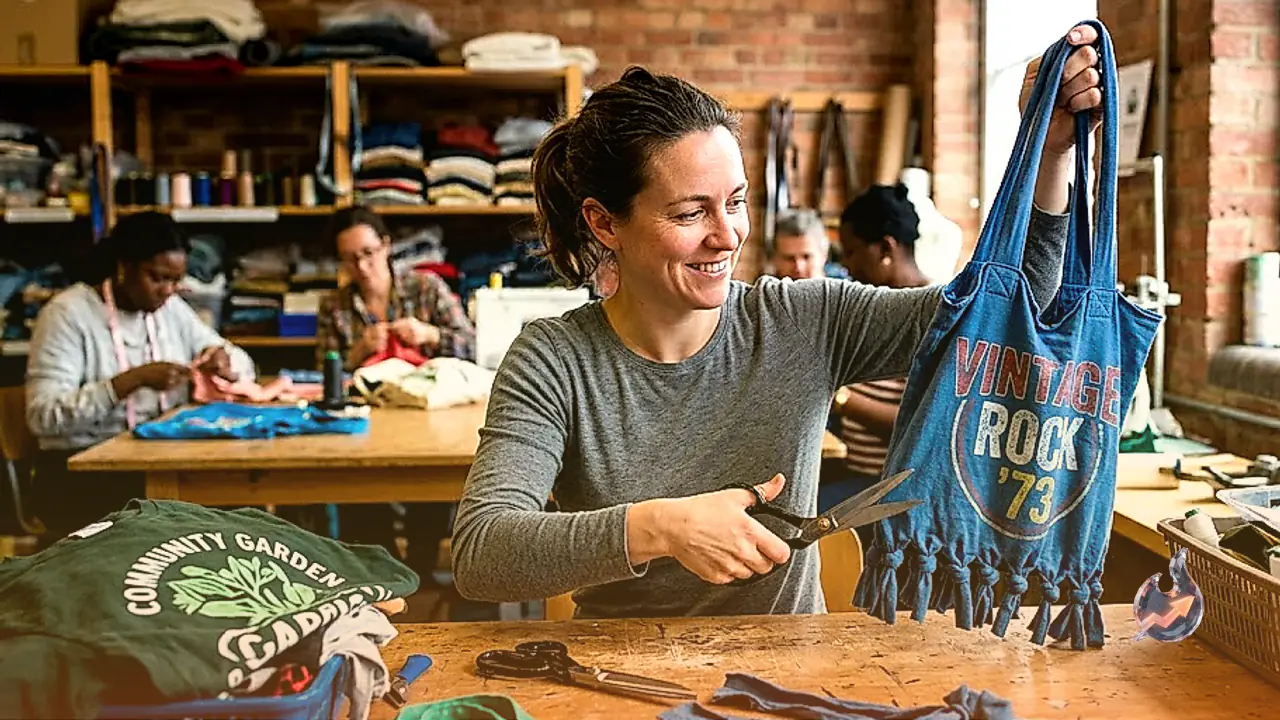
Using the drawn guide as your boundary, cut vertical slits from the open bottom up to the line, spacing each cut roughly three-quarters of an inch to one full inch apart. Cut through both the front and back fabric layers together so the matching strips line up directly opposite each other. Once cut, tie each corresponding front and back fringe strip into a tight double knot. Repeating this across the entire lower edge turns the open tube of cloth into a closed pouch.
Reinforcing Knots for Daily Use
After completing the first round of knots along the bottom edge, small gaps may remain visible between neighboring pairs, which could allow small items to slip through. To seal these gaps entirely, grab one loose strand from one knotted pair and tie it firmly to an adjacent strand from the neighboring pair. Once the secondary tying pass is complete across the entire base, turn the t-shirt right side out. Flipping the garment pushes all the tied knots into the interior cavity, presenting a clean, seamless exterior base.
Lift the finished tote gently and apply light tension to test whether any knots shift or loosen under pressure. If you intend to carry unusually heavy cargo, you can easily double the bag's strength by sliding a second identical cut shirt inside the first before tying. For those looking to add a personalized touch, applying fabric paint across the exterior surface creates unique artwork, while tying decorative knots into the top straps gives the finished piece a relaxed, bucket-bag silhouette.