























South Indian culinary tradition is celebrated for dishes that turn simple kitchen staples into culinary wonders through inventive cooking methods. Dibba Roti, a beloved specialty hailing from Andhra Pradesh, perfectly embodies this heritage. Unlike conventional Indian breads, this recipe requires neither the kneading of flour dough nor the effort of rolling sheets with a rolling pin. It relies entirely on a thick, well fermented idli or dosa batter. When cooked patiently on low heat inside a heavy bottomed pan, it develops an extraordinarily crispy, golden outer crust while retaining a soft, spongy, and aerated texture at its core.
The Dual Texture and Appeal of Dibba Roti
What sets Dibba Roti apart from a regular dosa or an uttapam is its remarkable thickness and contrasting texture. While a dosa is spread thin to achieve crispiness and an uttapam stays relatively thick and spongy on the surface, Dibba Roti strikes a unique balance between the two. Cooking it in a generous pool of hot oil ensures that the entire bottom and edges become deep golden and crunch like a fritter, whereas the interior steams into a pillowy consistency. This dual sensation makes it a fulfilling choice for a morning breakfast or an evening snack, providing an effortless way to utilize leftover fermented batter.
Ingredients Required
Preparing this regional delight requires only a handful of basic ingredients commonly available in Indian kitchens
- Idli or Dosa Batter: Two cups of dense, well fermented batter with salt already mixed in according to taste.
- Cooking Oil: Three to four tablespoons of oil, essential for shallow frying and achieving that signature crunchy base.
- Cumin Seeds: One teaspoon of whole cumin seeds, sprinkled over the wet batter for aroma and earthy flavor.
- Water: As required to fill the small steel glass used during the cooking process.
Step by Step Pan Cooking Process
Begin by placing a thick, heavy bottomed kadai or deep pan onto the stove over moderate heat. Pour in two to three tablespoons of cooking oil and allow it to get sufficiently hot. Once the oil reaches frying temperature, lower the heat to a gentle simmer. Carefully pour two cups of thick batter straight into the middle of the pan. It is crucial not to spread the batter as one would with a ladle for dosa; it must naturally settle into a thick, compact circular disc.
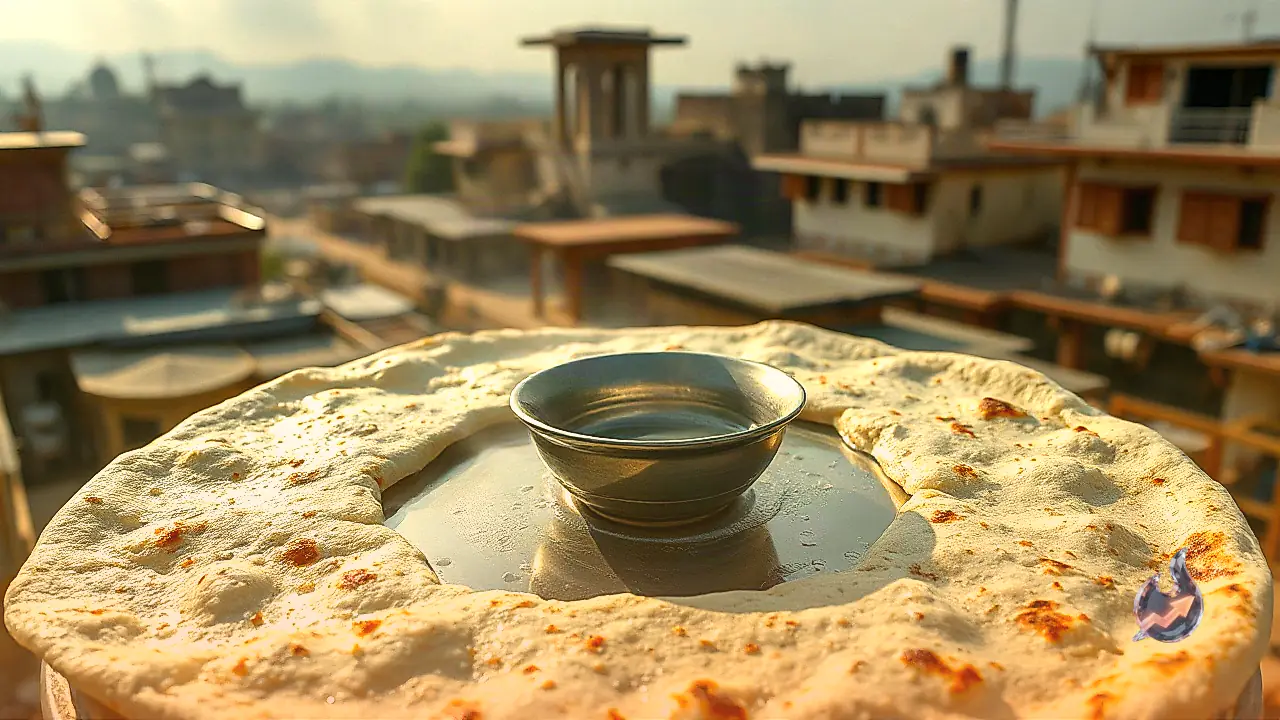
Next, take a small stainless steel tumbler or glass and fill it partially with water. Place this water filled vessel upright directly in the dead center of the wet batter. Immediately sprinkle one teaspoon of cumin seeds evenly across the exposed top layer. Cover the pan securely with a tight fitting lid and let the preparation cook undisturbed over a gentle, low flame for approximately eight to ten minutes.
Flipping Carefully and Serving Suggestions
After eight to ten minutes of slow cooking, lift the lid to check the progress. The bottom edges should appear visibly golden brown and crisp, while the top layer should look set and firm rather than runny. Because the metal tumbler absorbs immense heat during the cooking period, use a pair of tongs or a kitchen cloth to remove it carefully from the middle. With a wide flat spatula, gently flip the thick bread over to toast the other side for two to three minutes. Extreme caution is needed during the flip, as the weight and thickness can cause the roti to break in half if handled abruptly.
For those who prefer an extra crunchy crust, a light drizzle of additional oil around the circumference of the pan works wonders. Once both sides are roasted thoroughly, transfer the hot Dibba Roti onto a serving platter. It pairs wonderfully with freshly ground coconut chutney, spicy roasted peanut chutney, aromatic sambar, or a fiery South Indian tomato chili condiment.
The Purpose of the Glass Technique
Placing a water filled steel glass in the batter is far more than a quirky visual trick; it serves an ingenious thermodynamic function. Because the batter layer is dense and thick, the center usually takes much longer to heat through than the perimeter, creating a risk of remaining raw inside while the base burns. The metal glass acts as a thermal conduit while displacing batter from the core, allowing heat to radiate uniformly throughout the thick structure. This smart regional method ensures complete, uniform cooking while creating its distinctive donut like appearance.