























With the onset of the monsoon season, market prices for essential kitchen ingredients like ginger often skyrocket, putting extra pressure on monthly household budgets. Whether brewing a daily morning cup of tea or preparing flavorful curries, ginger remains an indispensable spice in most households. Instead of reducing its consumption, cultivating ginger at home in containers offers a practical and economical solution. If you have a small space on a balcony, rooftop, or near a bright window, you can easily grow fresh ginger at home. The best part is that you do not need to buy special seeds from a commercial nursery; a fresh ginger rhizome from your own kitchen counter is all it takes to get started.
Essential Materials and Choosing the Right Ginger Rhizome
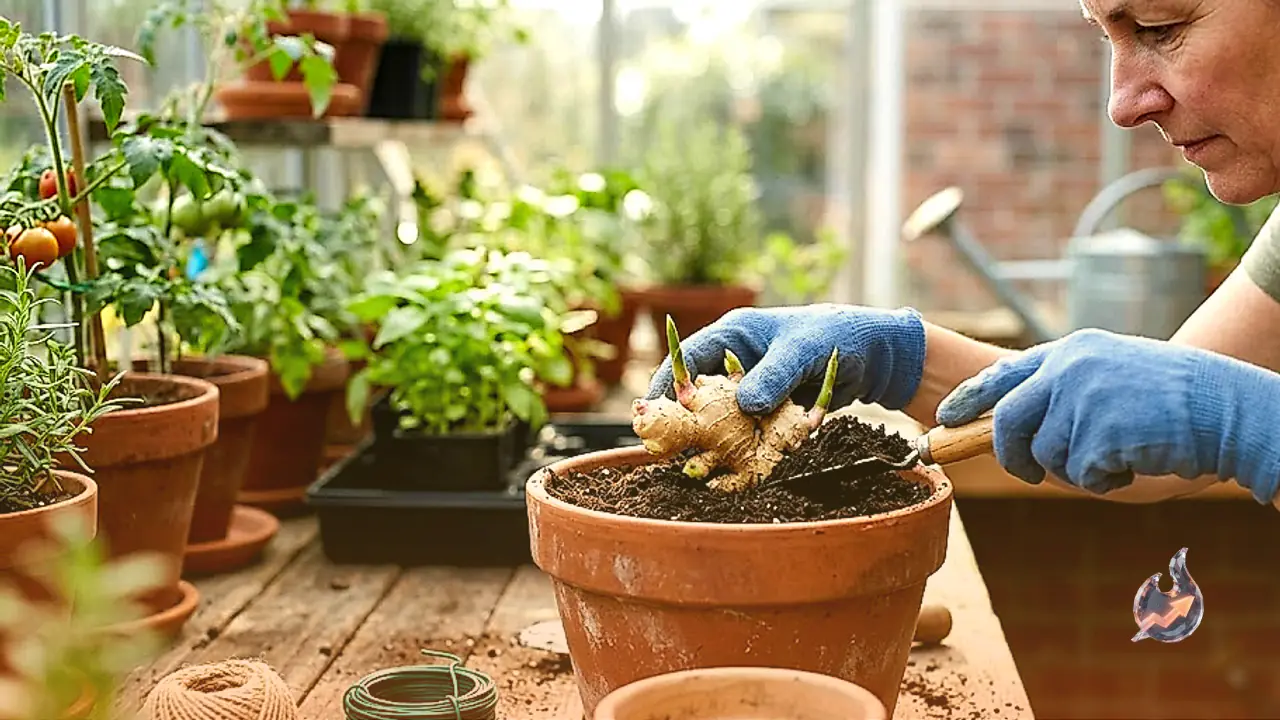
The first and most critical step in container ginger gardening is selecting the right ginger rhizome. Choose a piece from your kitchen or market that appears plump, firm, and healthy. Avoid pieces that feel soft, dried out, or show any signs of mold. Look specifically for rhizomes featuring visible growth buds or small bumps, often referred to as eyes. These buds are the exact points from which new green shoots will sprout, so choosing pieces with multiple active buds significantly increases your chances of successful growth.
Along with the rhizome, selecting the proper container plays a key role. Ginger rhizomes spread horizontally beneath the soil surface rather than growing deep roots. Consequently, a wide container is far more effective than a very deep one. Choose a pot that is at least 8 to 10 inches deep but offers plenty of surface width to allow the underground rhizomes room to expand. Additionally, ensure the pot features adequate drainage holes at the bottom so excess water can freely escape.
Preparing the Soil Mix and Pre-Treating Rhizomes
Ginger thrives in light, loose, and well-draining soil. If the growing medium is too dense or clay-like, the expanding rhizomes will struggle to grow properly. To prepare an ideal soil mix, combine standard garden soil with organic compost and cocopeat. Cocopeat helps retain gentle moisture while keeping the soil airy and light, whereas organic compost supplies vital nutrients necessary for robust plant development.
Before planting, divide your selected ginger rhizome into smaller pieces. Ensure that every individual section contains at least one or two healthy, undamaged buds. To encourage faster sprouting, consider soaking these cut pieces in clean water for a few hours prior to planting. This step boosts the moisture content inside the rhizome and prepares it for active growth. Afterward, remove the pieces from the water and let them air-dry briefly before placing them in the soil.
Planting Technique and Proper Watering Discipline
Fill your chosen container with the prepared soil mixture. Gently press the ginger pieces into the soil at a depth of roughly 2 to 5 centimeters. Pay close attention to the orientation: the active buds should point upward toward the surface. Cover the pieces with a light layer of soil and press down gently, followed by a modest application of water to settle the soil around the rhizomes.
Mastering the watering routine is vital for success, as overwatering is the most common mistake made by beginner gardeners. The soil should remain consistently moist, but water must never be allowed to pool or stagnate. Stagnant water causes the underground rhizome to rot, destroying the crop. Always check the top layer of soil before adding water; only irrigate when the surface feels slightly dry. During humid monsoon weather, atmospheric moisture is higher, meaning the plant will require even less frequent watering.
Sprouting Timeline, Light Requirements, and Plant Care
The speed at which ginger shoots emerge depends on temperature, soil condition, and care. Under favorable conditions, small green shoots typically begin peeking through the soil in about 10 days. In cooler or less ideal conditions, sprouting may take slightly longer. Do not be discouraged if early top growth appears slow, as the plant focuses much of its energy on expanding its root structure and underground rhizomes.
Position your potted ginger in a spot that receives bright indirect sunlight or gentle morning sun. Avoid placing the container in harsh, direct afternoon sunlight for prolonged periods, as excessive heat can scorch the leaves. To support ongoing development, apply small amounts of organic fertilizer or vermicompost periodically. Keep fertilizer applications light and balanced, as excessive nutrients can harm the developing rhizomes.
Harvesting Process and Benefits of Growing at Home
Harvesting your homegrown ginger requires patience, as the rhizomes take several months to mature fully beneath the soil. You will know it is time to inspect the harvest when the plant leaves gradually turn yellow and overall top growth slows down. When ready, carefully dig into the soil to harvest individual sections of ginger as needed for your kitchen, allowing the rest of the plant to continue growing.
Cultivating ginger in pots is not only a clever way to beat rising vegetable prices but also a rewarding introduction to home kitchen gardening. With minimal space, a healthy kitchen rhizome, and balanced care, you can enjoy a continuous supply of fresh, aromatic, chemical-free ginger straight from your balcony or windowsill.